Adding TiltFive To Unity Sample Projects
10 May 2023Introduction
I finally got a chance to return to my TiltFive headset! The latest buzz on their Discord channel is around support for building and using Android devices with their kit. It’s in beta, but the lack of content at such an early stage intrigued me. Surely, it wouldn’t be that hard to convert an existing Unity sample project to use the TiltFive headset and wand controller, right? If I could accomplish that, then building it for several different platforms would be viable. In the end I succeeded, but I thought I’d share a walkthrough on how it went to make this process easier for others.
Requirements
- An instance of the Unity Editor
- At the time of writing, TiltFive’s requirements state that you would need version 2018 LTS or newer for Windows and Linux, 2019 LTS or newer for Android. I used 2021 LTS for this post.
- A TiltFive headset and wand controller
- Technically this isn’t required, as you can code without it. However, there is no way for you to verify full success without using the actual hardware.
- The latest TiltFive drivers and SDK (both are available from their Developer Portal)
Creating The Unity Project
Let’s begin!
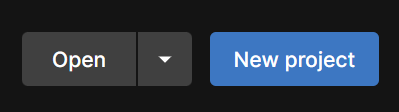
- First, open the Unity Hub and click on “New Project”.

- In the “New project” dialog, scroll down and select the “Karting Microgame” entry.

- One you have selected “Karting Microgame”, select the “Download template” option on the right side.

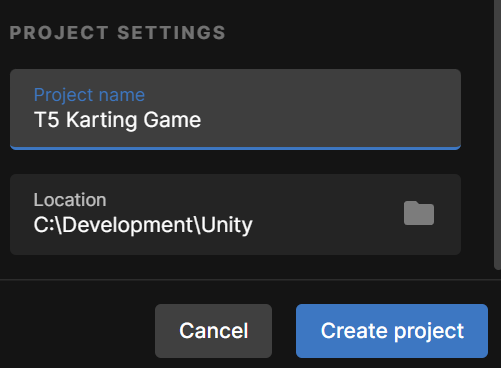
- One the template has downloaded, enter a name for your project and select where it should be saved. When finished, click “Create Project” to launch the Unity Editor.

- Since this game is intended (by Unity) as a tutorial, the first screen you will see offers to load tutorials. You won’t need them for this guide, so choose the “Load Scene” button.
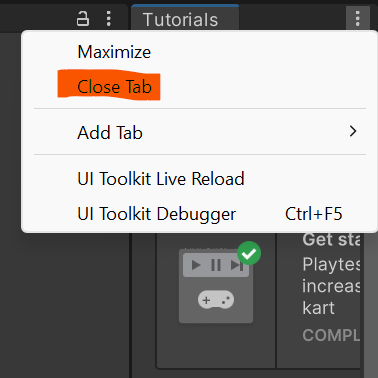
- At this point you should be in the Editor. Despite our best efforts, Unity is still showing a “Tutorial” sidebar on the right side, so right-click the “Tutorial” tab and select “Close tab” to get back some space.
- As a note, there’s nothing wrong with following the tutorials and they’ll actually make the resulting game much more interesting if you did. However, making a game more fun is outside the scope of this blog post, so we’re choosing to ignore any tutorials.

- As a note, there’s nothing wrong with following the tutorials and they’ll actually make the resulting game much more interesting if you did. However, making a game more fun is outside the scope of this blog post, so we’re choosing to ignore any tutorials.
- You may see that the bottom of the Unity Editor displays an error like,
NullReferenceException: Object reference not set to an instance of an object. That’s fine, we can fix that by updating Unity’s Version Control package.
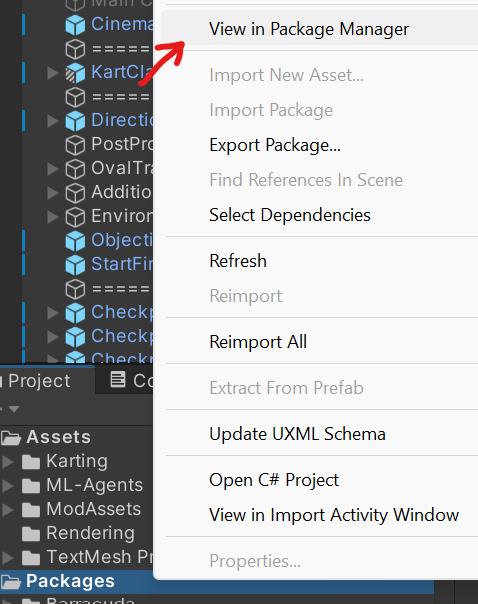
- To do so, in the “Project” tab right-click on “Packages” and select “View in Package Manager”

- In the “Package Manager” window, scroll down and select the “Version Control” package

- Once selected, click the “Update to
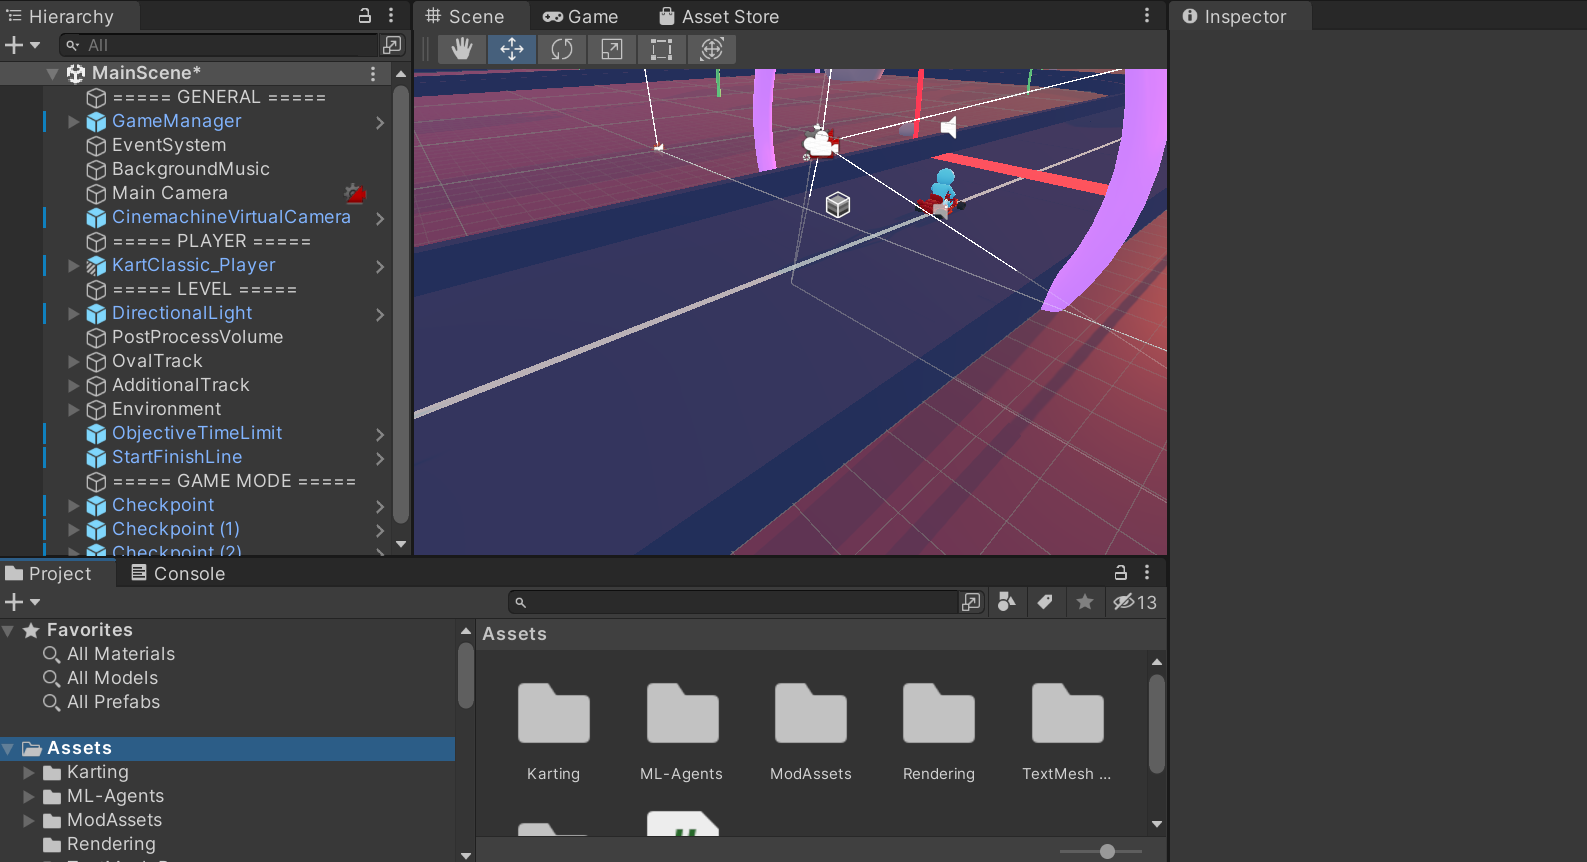
" button. Unity will update the package, then you can close the "Package Manager" window - As a checkpoint, your Unity Editor now should look something like the following picture:

- If so, congratulations! Now it’s time to dive into the actual “how to” portion.


Instructions
The basic idea here is straightforward: import the TiltFive Prefab (which also contains their Unity SDK), adapt the game to make use of it, and test/build the game!
Import TiltFive Prefab
TiltFive offers their Unity objects for the gameboard and camera, as well as their SDK, as a Unity prefab. They provide helpful instructions for how to import this into Unity on the Unity Plugin section of their developer documentation. Go through those steps first to ensure that the TiltFive assets have been properly imported.
Now that the prefab is successfully imported, add it to the project.
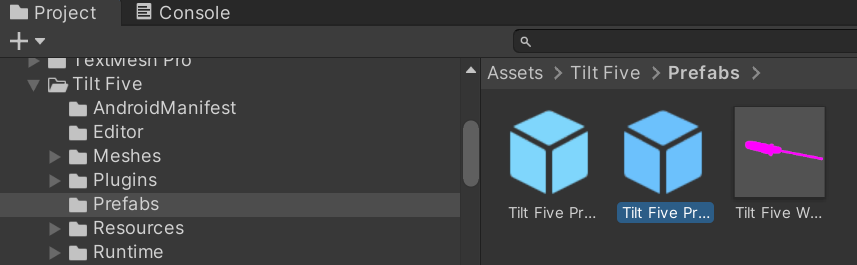
- In the “Project” tab, navigate to “Assets” > “Tilt Five” > “Prefabs”.
- At the time of this writing, there are two Tilt Five prefabs, “Tilt Five Prototype” and “Tilt Five Prefab”. The “Prototype” is deprecated, so make sure you use the “Prefab” version.

- At the time of this writing, there are two Tilt Five prefabs, “Tilt Five Prototype” and “Tilt Five Prefab”. The “Prototype” is deprecated, so make sure you use the “Prefab” version.
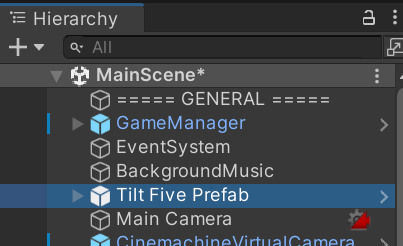
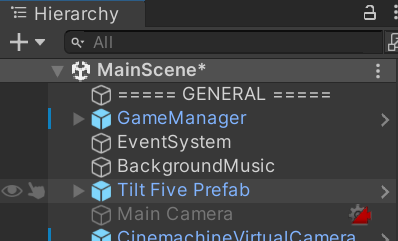
- Drag this prefab into Unity’s “Hierarchy”, right above the “Main Camera” object. From there, we can move on to the next section.

Disable Main Camera
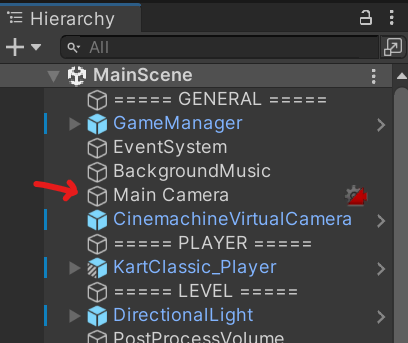
TiltFive recommends disabling or deleting the default Unity camera, and that makes sense since they provide an alternate camera of their own.
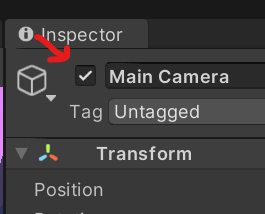
- In the Unity Hierarchy pane, find the “Main Camera” object and select it.

- In the “Inspector” pane on the right side of the screen, locate the checkmark next to the object’s name (“Main Camera”) and clear it to disable the object.

Set Game Board To Follow Player
In the Unity Karting sample, the default camera we disabled is pre-configured to “follow” the race car the player would drive. By default, the TiltFive system wouldn’t know to do the same unless we tweak its configuration. However, TiltFive uses your own real-life movement as a “camera” input. For this reason we won’t tweak the TiltFive camera object in Unity, and we will instead tell the TiltFive gameboard object to always exist at the same spot, both in position and rotation,that the racecar does. This will function identically to the default “follow” Unity camera, with the added benefit that if you move around the physical TiltFive board your perspective will change in real-time as well.
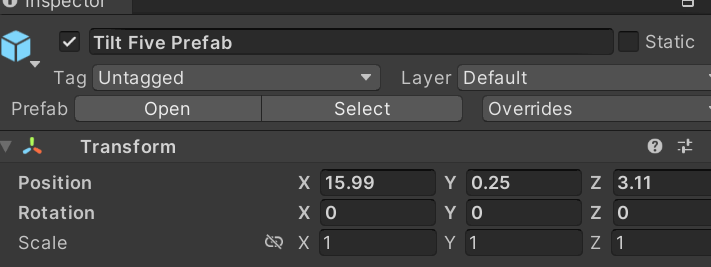
- Back in the Unity editor, click on the “Tilt Five Prefab” object in the Hierarchy.

- In the “Inspector” panel on the right, locate the “Position” variables under the “Transform” section. Change them to roughly the following so they center on the race car:
- X:
15.99 - Y:
0.25 - Z:
3.11
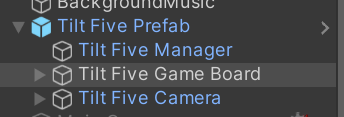
- X:
- In the Hierarchy, expand the “Tilt Five Prefab” object and select the “Tilt Five Camera”. Change its “Position” variables as well to give it a bit of distance from the race car:
- X:
0 - Y:
0.56 - Z:
-2.47
- X:
- In the Hierarchy, select the “Tilt Five Game Board” object.

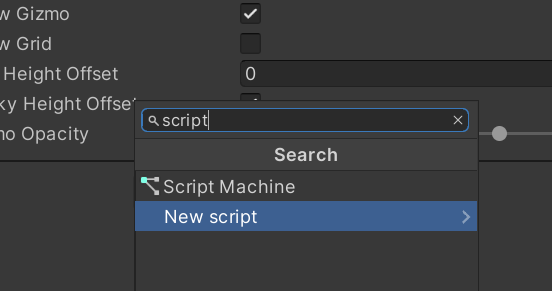
- In the “Inspector” panel on the right, scroll down to the bottom and select “Add New Component”. In this dialog create a blank script (type “script” in the little search bar if you have trouble finding it).

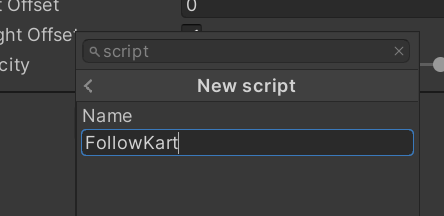
- Name the script “FollowKart”, then click “Create and Add”.

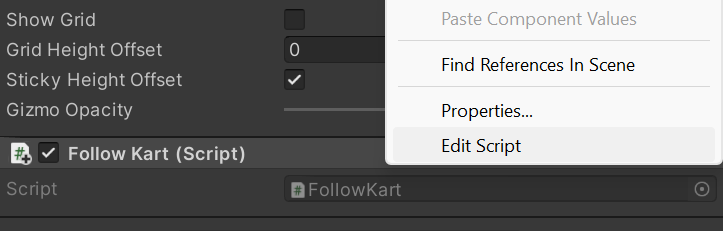
- You should now see a “FollowKart (script)” section in the “Inspector” pane. Click the three vertical dots next to its name and select “Edit Script” to open your editor.

-
In the editor, paste the following code (which is mostly from TiltFive’s Game Board documentation):
-
using System.Collections;
using System.Collections.Generic;
using UnityEngine;

[DefaultExecutionOrder(100)]
public class FollowKart : MonoBehaviour
{
    // The Game Board Transform.
    public Transform gameBoardTransform;

    // The object to be followed.
    public Transform followObject;

    // Start is called before the first frame update
    void Start()
    {

    }

    // Update is called once per frame
    void Update()
    {
        gameBoardTransform.position = followObject.position;
        gameBoardTransform.rotation = followObject.rotation;
    }
}
-
- Save the script in the editor and exit the editor to return to Unity. (Unity will recompile its scripts briefly, that’s normal.)
- The “FollowKart (script)” section has now updated to reflect the variables which we set in code.

- Click the circle to the far right of the “Game Board Transform” variable. Search for “game board” in the popup, and double-click the “Tilt Five Game Board” entry.

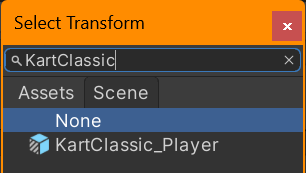
- Click the circle to the far right of the “Follow Object” variable. Search for “KartClassic” and double-click the “KartClassic_Player” entry.

- Save your Unity project, either via the menu (“File” > “Save”) or the keyboard (Ctrl + S).


There is one behavior which really caught me off guard while I was developing. If you do not have any TiltFive hardware active on your computer, the camera will not move. This seems to be expected behavior, the TiltFive game board + camera components in Unity only update when there’s hardware available to update them.
Add TiltFive Wand To Player Controls
TiltFive’s wand controls approximate the UnityEngine.Input API, but use their own API calls to do so. For some projects, this API will be available for use right away. However, as the Karting game uses Unity assemblies for some components, we will first need to add a reference to the TiltFive API to the race car object’s assembly. TiltFive also provides ways to alter whether a controller should be right- or left-handed, but we will leave it as the default in these instructions. Feel free to build configurable right- or left-handed options if you wish!
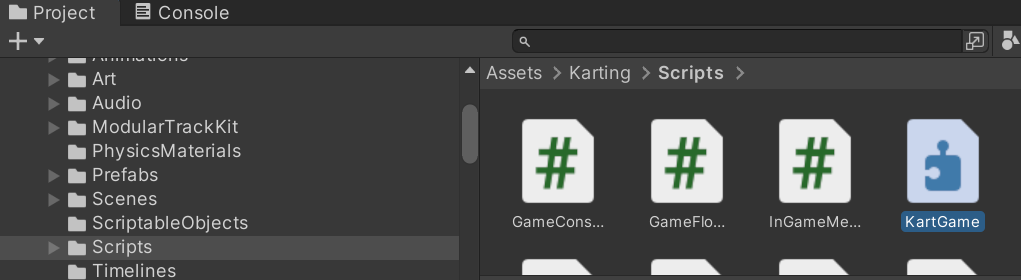
- In the Unity Project pane, locate “Assets” > “Karting” > “Scripts”. Select the “KartGame” assembly.

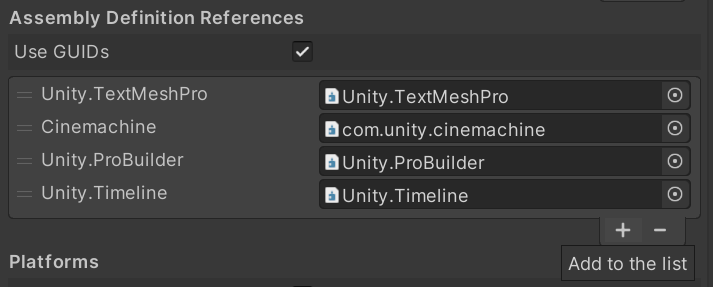
- In the “Inspector” pane on the right, locate the “Assembly Definition References” section. Click the “+” button to add a new reference.

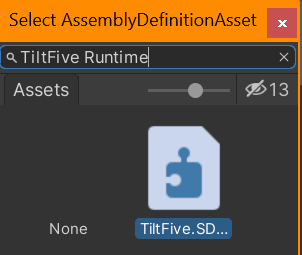
- The new reference will show as a variable called “(Missing Reference)”. Click the circle button to the right and search for “TiltFive Runtime”. Double-click the “TiltFive.SDK.Runtime” object.

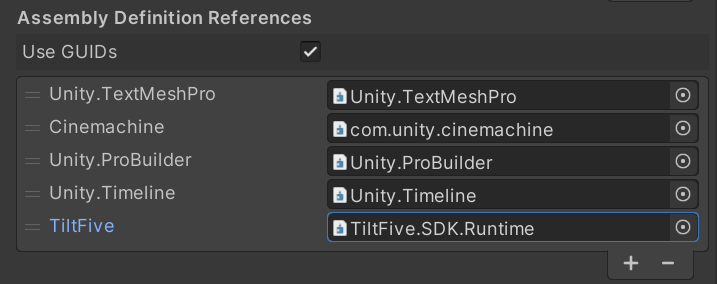
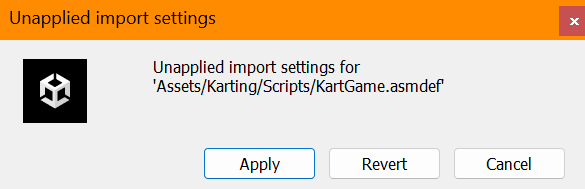
- When this is finished, your “Assembly Definition References” should look like the below picture.

- Click any object in the Hierarchy to take focus away from the “Inspector” pane. You should see a Unity dialog similar to the following picture. Click “Apply” and let Unity recompile.

- Save the Unity project again.
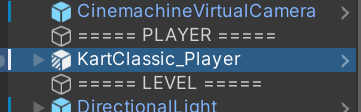
- In the Hierarchy, select the “KartClassic_Player” object.

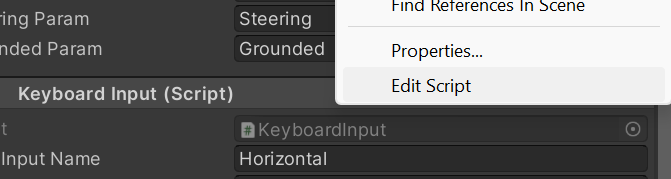
- In the “Inspector” pane on the right, scroll down to the bottom until you see the “Keyboard Input (script)” section. Click the three vertical dots next to its name and select “Edit Script”.

-
Within the opened script, replace the contents with the following code:
-
using UnityEngine;

namespace KartGame.KartSystems {

    public class KeyboardInput : BaseInput
    {
        public string TurnInputName = "Horizontal";
        public string AccelerateButtonName = "Accelerate";
        public string BrakeButtonName = "Brake";

        public override InputData GenerateInput() {
            // Check if the TiltFive wand is available for use
            if (TiltFive.Input.GetWandAvailability())
            {
                return new InputData
                {
                    // Wand controller button "A"
                    Accelerate = TiltFive.Input.GetButton(TiltFive.Input.WandButton.A),
                    // Wand controller button "B"
                    Brake = TiltFive.Input.GetButton(TiltFive.Input.WandButton.B),
                    // Wand controller stick, assuming that the user will turn the wand on its side to use it like a gamepad
                    TurnInput = TiltFive.Input.GetStickTilt().y * -1
                };
            }
            else
            {
                return new InputData
                {
                    Accelerate = Input.GetButton(AccelerateButtonName),
                    Brake = Input.GetButton(BrakeButtonName),
                    TurnInput = Input.GetAxis("Horizontal")
                };
            }
        }
    }
}
-
- Save the script and return to the Unity Editor. You shouldn’t see any errors.
At this point, it’s actually possible to use the TiltFive Wand directly within Unity’s game preview screen if you wish. Just click the “Play” button at the top of the editor to test the controls, and adjust as necessary. If your TiltFive headset is hooked up correctly, you can also look at your physical game board to see the results of your work.
Build Project
From here, what’s left? Well, this project only exists within Unity and couldn’t yet be played anywhere else. What if we want to take it places or show it off to friends? For that we’d have to build a binary, something executable outside Unity. To wrap up this post I’ll walk through building on Windows, but TiltFive already supports Linux and (as a beta) Android as well.
- In the Unity editor, save your project if you haven’t recently.
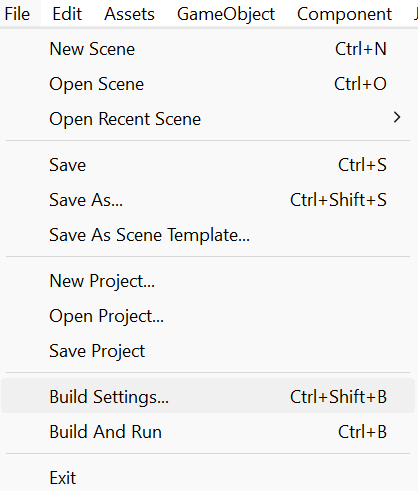
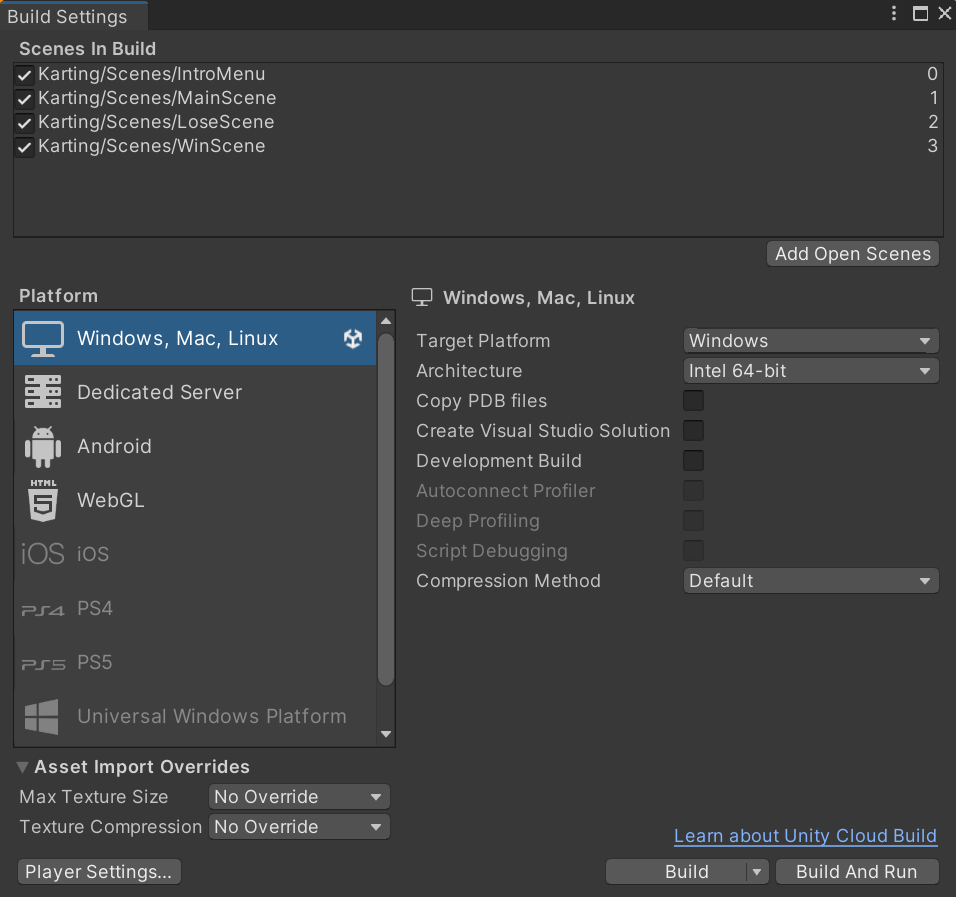
- Navigate to “File” > “Build Settings”.

- You should see a screen like the below image.

- Click “Build” here to finish the process if you don’t mind everything being a default value. If you wish to change details like the game’s name, its icon, or other details, just click the “Player Settings…” button in the lower left before you click “Build”.
- By default, the executable will be named “T5 Karting Game” (the name of the Unity project).
Final Words
There are many possible paths to take from here, including refining the game, optimizing the build, or just plain playing the game! The two largest hurdles to integrating TiltFive into Unity, however, seem to be the gameboard and the wand controller. By adding both of these in already, it should be possible to simply “make a Unity game” from here on out with no TiltFive-specific coding necessary.
Have fun!